Friday, April 22, 2016

Designing New Drone Enemy [Haca Fairstalk Animation]

Just got back from California and I'm ready to get back to work on some new artwork. For those that didn't know, I spent the past week in San Jose teaching kids about Maya at iD Tech Camp. My students were very advanced and we got through a ton of content in such a short time. We went over modeling tools, animation, lighting, cameras, Mudbox, and even some UV mapping. And best of all, I got the chance to play with a 3D printer! It was a super fun week full of friends new and old, and now I'm even more excited to spend the summer at the iD Gaming Academy at Stanford.

With this re-invigorated passion for 3D modeling, I got right back to work on my Haca Fairstalk project. I promised more frequent bite-sized posts so I'll keep this somewhat short.

As part of the animation, Haca is running through this tattered junkyard doing all kinds of acrobatic flips and maneuvers. I wanted there to be some kind of conflict but creating another full character would be too time consuming. So instead I got the idea of some kind of small but destructive robots. I've been wanting to create more hard surface models with complex mechanical rigging, so an attack drone seemed like the perfect solution.


I scoured the web for all kinds of references and came up with these sketches. This drone is called Divith Geiger 107. I want it to have some elements of horror sci-fi while still maintaining believable mechanics. It has a hard layered shell on top which houses an eyeball camera on a crane. Below the body, it carries a high powered rifle for picking off its targets.


After coming up with the design, I put together a prototype in Maya using primitive shapes. This is to help visualize some of the movements that the propeller makes.


Here is a short playblast of the propeller retracting into the base of the drone. Probably going to scale up the size of the blades.

Next on the agenda is creating primitives for other movable parts and then I can move on to the actual models for the drone. Next post should be a bit more visually appealing so look forward to that. Until next time... Adios!

Tuesday, April 5, 2016

New Character Project - Haca Fairstalk

Hey guys, today I wanted to share a project that I've been working on for the past month or so. I've been transforming one of my existing characters into a 3D model, and I'm planning to create a short animated sequence of her. The end goal of this project is a full scene running in Unreal 4. It should be pretty cool, so I hope you'll stay tuned to check out all of my updates. I have a ton of images documenting various stages of the process, so this will be a pretty meaty post. For future updates, I think I might try making frequent bite-sized posts every few days to show my progression.

With this project, I have a couple of major goals. For this character, I am trying my hand at a number of new current-gen techniques that big budget games usually use. For starters, I wanted to utilize Substance Painter and incorporate a PBR texture system. That means roughness maps, metallic maps, microsurface, etc. I also want to shoot for a slightly higher polycount than I'm used to. I was trained to be very restrictive with my resources, but as hardware evolves to accommodate higher polycounts, it's important to utilize those resources to improve the quality of your work. Currently I'm at 26k triangles without major accessories/weapons, so that's quite a bit higher than I'm used to working with.

Additionally, this project will incorporate various physics techniques using Nvidia's GameWorks plugins. I learned a lot about APEX cloth physics on some of my recent freelance work, and now I'd like to add it to a project of my own. I have also been experimenting with HairWorks and plan to use that on the character as well. And of course getting it all working in Unreal 4 should be a good test of creating game-ready content. Without further ado, here are some of the progress shots.


I started things off with a concept sketch. Luckily the character had been previously designed (including this awesome picture my sister drew), so this stage was mostly about getting the shapes down and creating a good reference.


From there I modeled out the torso. I took extra care to properly capture natural curves and make sure that the edge flow followed the shape of the body. This step is incredibly important, and I'm very happy with how I created the initial geometry.


Next I modeled the arms, legs, and face. At first, I felt some of these shapes looked too blocky and unnatural. Maya has some built-in sculpting tools that you can use to relax geometry, but instead I decided to toss the model in ZBrush to quickly smooth out some rough spots.


I planned for Haca's boots and shirt to be directly built into the main model, so once I finished UVing, I quickly tossed on some stand-in materials to separate the clothes. It helps to visualize the finished mesh a little more than using that standard grey material.


Next came the belt and skirt. Since the skirt will be controlled with APEX cloth physics, it has to be its own separate model. I experimented with a couple of different styles before deciding on that slightly ruffled look.


After modeling some jewelery, I took Haca back into ZBrush to add in some more details. You can see her collarbone and some of the muscles in her neck and abdomen now. I also did a lot of work on her face to make it less lumpy and more defined. For this stage I used a lot of references of real models.


At this point, the model is ready for texturing. I took her into Substance Painter and started creating a skin shader. It's not super visible in this shot, but there is a subtle layer of roughness on the skin that helps to highlight the pores on human skin.


I spent quite a bit of time in Painter to hammer out those details. From the fabric of her skirt to the edges of her fingernails, I really wanted to go all out to capture all of the minor aspects of a human character.


 Those details are highlighted by things like lace holes on the boots and corset and various stitches and leather textures.


I even made sure to give texture to the strings themselves, using height maps and painted shadows. These are details that you wouldn't really catch from a distance, but they add to the overall believe-ability of the model.


For far too long, I was using a basic stand-in texture for the eyes. I think eyes are incredibly important in creating lifelike models and it is an area that I often struggle with. However with the added reflectivity and amount of detail that I painted into the cornea, I think I managed to shift this further away from the cartoony spectrum that I often fall into.


After finally calling the texturing done, it was time to move onto to rigging. To help speed along this process, I tried out Unreal's Animation and Rigging Tools. While there were still a lot of corrections to make and weight painting to do, the automation helped speed up some of the more tedious parts like plotting out the individual joints. There aren't a ton of interesting visuals to show for the rigging process, but now I can put Haca into all sorts of goofy poses!

This is pretty much the current state of the project. With the character modeled, UVed, textured, and rigged, most of the remaining tasks are animation based. I will be modeling a spear for her to use and then moving on to skirt physics and creating hair. I have already started gathering video references for a lot of her movements, so the next post should be fairly animated and exciting.

I hope you enjoyed this glimpse into my character design process. This is one of my favorite personal projects I've worked on so far, and I'm excited to see it all come together in a big game engine. For the next 10 days or so, I will be occupied with teaching Maya classes at iD Tech (working at Spring Break Camp in California again this year!), but once I return I plan to post more frequent updates of this project. Until then... Adios!

Monday, February 29, 2016

Leap Day Art Update

Happy February 29th everybody! I almost missed making a blog update this month, but luckily we were gifted with an extra day this year.

So far, I've been pretty good about my New Year's resolution of setting aside time to do personal artwork. I've got a pretty big 3D animation in the works for my portfolio, but that one isn't quite ready to show off yet. I ran into a bit of trouble between my tablet and Substance Painter, so I've got a new Wacom on the way. Expect a big update about that project next post.

For now, I wanted to show some of the 2D drawings that I've been doing. For my first drawing of the year, I decided to make something a bit bizarre. I was going through a list of game ideas that I jotted down one day, and I came across this idea about a 2D fighting game where everybody looks like they were made out of paper. Everyone would be drawn on notebook scraps and have a traditional style. I don't think I'm going to take on a project of that magnitude any time soon, but I figured it would be fun to draw a quick mockup character.


Continuing the traditional artwork trend, I drew this picture of Chozu one night with an ink pen and a sharpie. I've always been impressed by the amazing things that people can do with pens, especially manga artists. Having those pure blacks gives a really nice contrast, so I looked up some references and decided to create a fake comic book page. Something else should probably go in that bottom corner, but I'm rather satisfied with this one so I'm a bit scared of messing it up by adding more to it. There's no ctrl+z when you draw on paper!


I decided to do some more pen & ink after that with some Pokemon. I've been really into the whole 20th anniversary celebration, so I recently replayed Pokemon Fire Red. After that, I decided to draw the team that I used in the game. I did a similar piece with Pokemon Black a few years ago when my tablet was broken, so I thought it would be nice to use a similar style. I drew this first on paper, scanned it, and colored it in Photoshop. Heavily inspired by the original Ken Sugimori concept art and his use of watercolors.


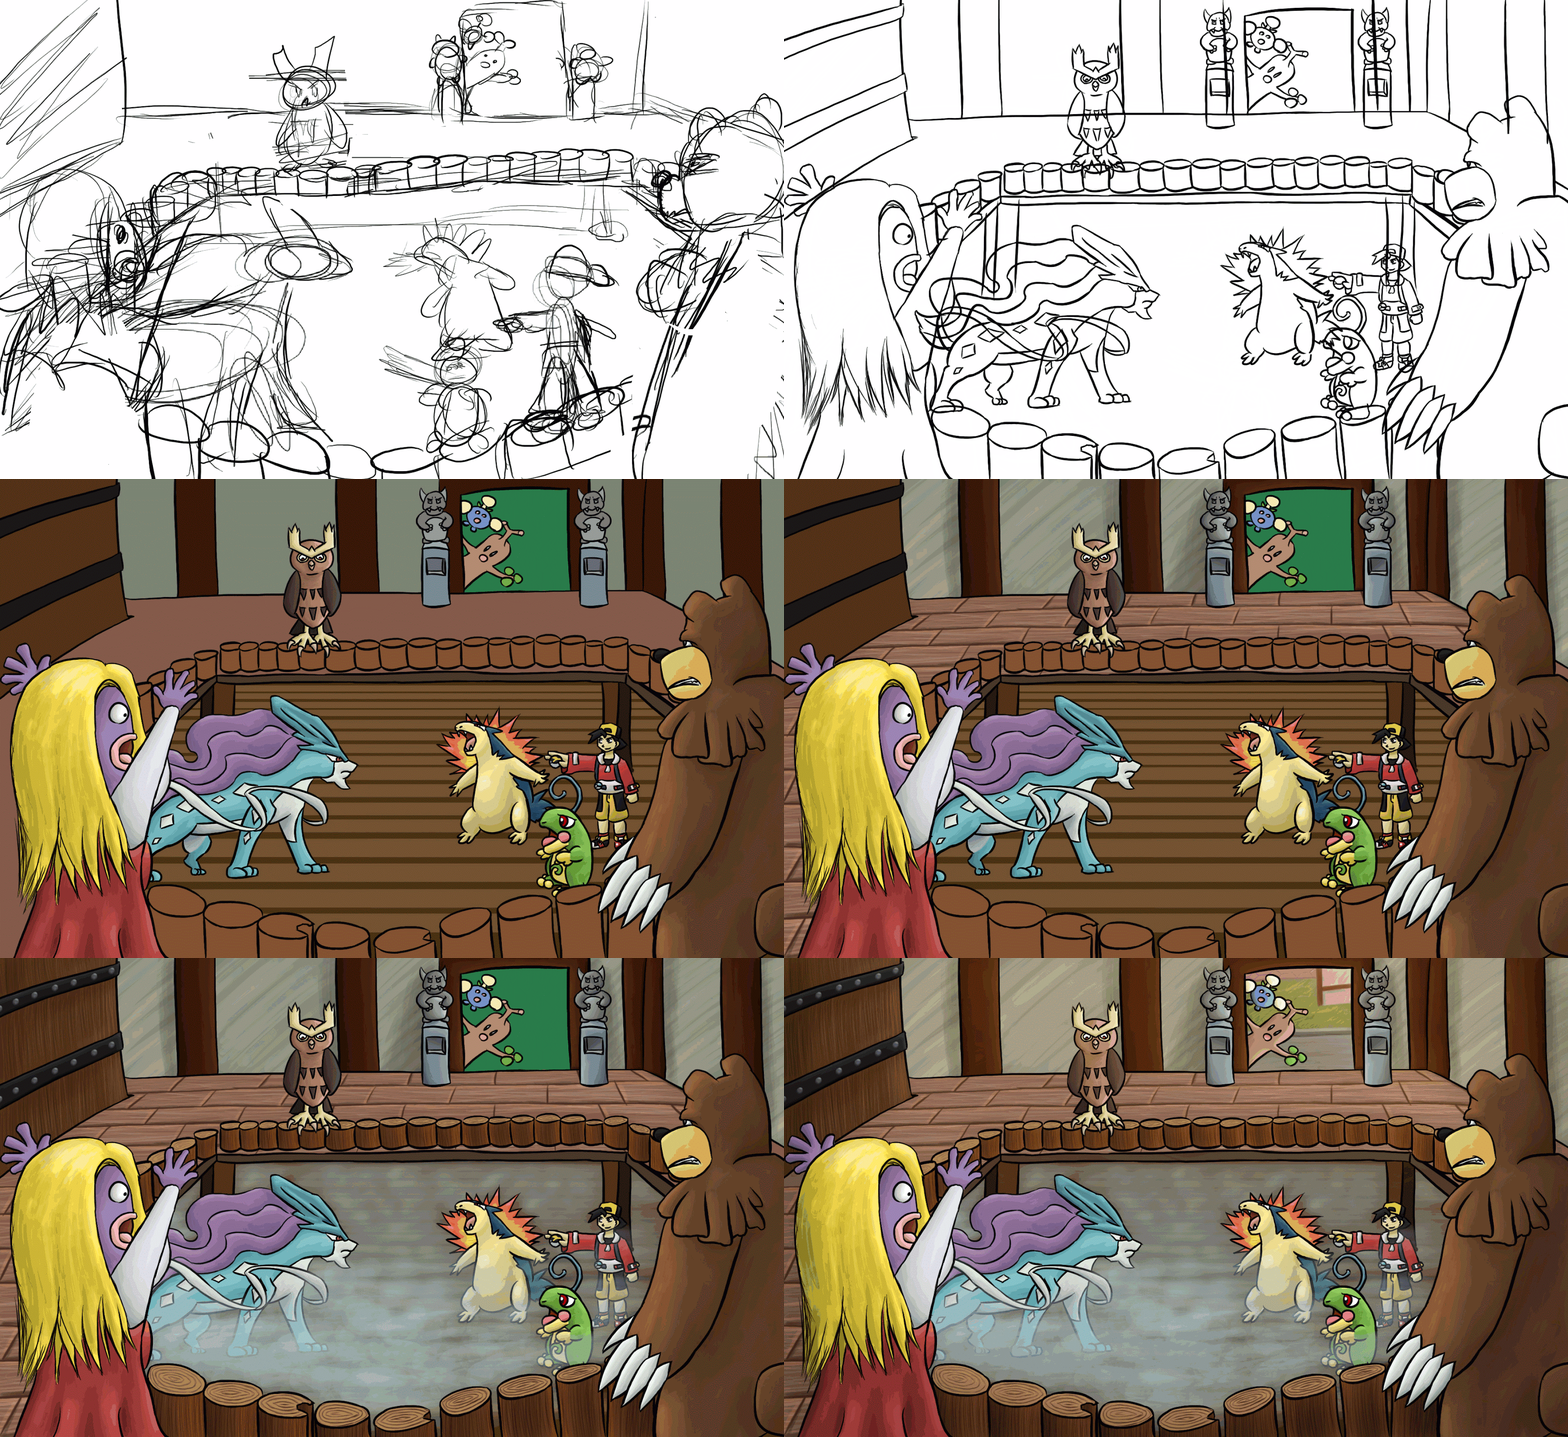
Clearly that wasn't enough Pokemon for me, as I then moved onto Pokemon Crystal on GBC. For this one, I decided to go purely digital so I could have a bit more control over things. Instead of a static team photo, I went with a full scene. This is the gang encountering (and capturing) the legendary Suicune inside the Tin Tower at Ecruteak City.


It's been a while since I did a full scene with so many characters, so this took me a bit longer than expected. Overall, it was a lot of fun though. I always love when artists show their process, so below you can see the all of the different phases I went through. That first sketch sure was messy...


 Because I have different heights and distances in the scene, I decided to experiment with some depth of field. I think I could probably get this looking a bit better, but it was sort of just an after thought I decided to play with at the end.


Speaking of extra features, I also thought it would be fun to animate this scene a little. This picture wasn't really made for animation, so don't mind the weird gaps that appear in some places. But I thought it might be fun to move some of the layers around to highlight the fact that it's on a bunch of different planes. This is the kind of subtle animation you might see in something like a motion comic.


Anyways, that wraps it up for this month. It has been nice to take some time to draw for myself again. I should have my new tablet this week, so expect to see a pretty big post about my new 3D project next month. Until next time... Adios!

Wednesday, December 30, 2015

2015: The Year of Dreams

Happy New Year everybody! It's pretty crazy that we're moving onto 2016 already, but before we do, I wanted to take a moment to look back at some cool things that happened in 2015. The gaming industry as a whole had a really good year, and a lot of amazing new surprises got announced throughout this trip around the sun. My New Year's resolution last year was to write a blog post a month. As you can tell, I fell a bit short of that goal, but I did at least manage to keep the blog somewhat active for most of the year. Here's hoping I continue that pace going forward.

In terms of art, I had one of my most productive years yet, so I'm definitely going to file 2015 on the "good shelf." Surviving in this industry is tough, and it can be really frustrating coming out of college and facing so many hurdles and rejection on the path to starting a career. But after a long time, I'm finally starting to feel more confident in my work and develop a more positive about my future. Hopefully it only gets better from here on out!

In 2015, I traveled to California three times (once for GDC, once for PSX, and once to teach at iD Tech Spring Break Camp), I spent the summer teaching in Seattle, I worked on my first ever Kickstarter campaign, I released my first ever mobile game on iOS, I got to work on my first Steam game, I got the chance to work with the wonderful folks at BrightCovers, and I worked on a whole slew of other interesting small projects. It was definitely a milestone year for me in terms of new experiences, and I'm really excited to see what comes next.

In these posts, I tend to have a lot of talking and not enough images (especially considering this is an art blog!), so I'm going to include a ton of pictures in this post. Without further ado, here's what I've been doing:


I've been doing a lot of work for Bright Covers, a local patio covering company here in Cleveland. I've been creating instructional videos for the assemblers as well as some promotional material to show off the product.


I came up with a few new rendering techniques along the way that I will definitely be utilizing again in the near future.


Here's the full animation that instructs owners how to construct their new unit.


I'm also in the process of creating some new mascot characters. This is still a work in progress, so he's not quite done yet. If you happen to attend any of the local home & garden shows though, you might be able to see the finished product!


As I mentioned, I also got to work on an early access Steam game called Grimoire: Manastorm. My role on Grimoire was mostly behind-the-scenes rigging and weight painting tasks, but it was a fun job nonetheless. If you follow the game on Steam, stay tuned for an upcoming update that will incorporate all of the cool cloth physics I've been working on!


On another note, I'm not sure if I posted this on the blog, but Wave Crash is officially out on iOS now! It's completely free and available right on your iPhone or iPad. Check it out! We put a ton of hard work into it. Going forward, our crew has some exciting new plans that may or may not include the use of VR headsets, but I'll talk more about that at a later date.


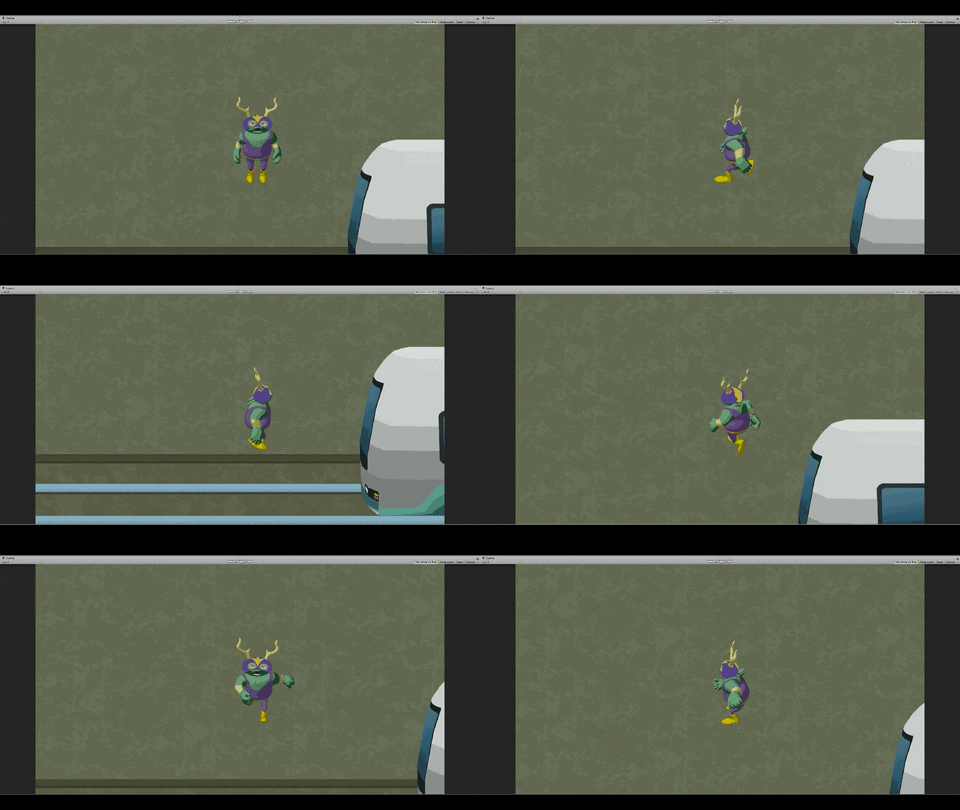
I also did a bunch of animation work earlier in the year. This is using a pre-rigged model, so the focus here is the wall running animation.

 As many cool projects as I worked on this year, I feel I didn't quite make as much personal artwork as I did in the past. I'm happy that work is keeping me busy, but it's still important to continue doing artwork for my own sake as well. And so for 2016, my goal is to draw one finished scene each month. I'm leaving the specifics of that requirement a bit open-ended, but each scene should be finished enough that I would be willing to submit it to my deviantArt gallery (and not in the scraps section!). I think it's an achievable goal, and it will be fun to go back to what got me into art in the first place: drawing for fun!

On that note, here's some of the personal artwork that I did manage to do this year. It's mostly related to The Nays (the series my sister and I created), so most of it hasn't been released online until now.


This was a Christmas present for my sister. Disclaimer: I have no claim own over any of the music, but the goofy voices are 100% mine!
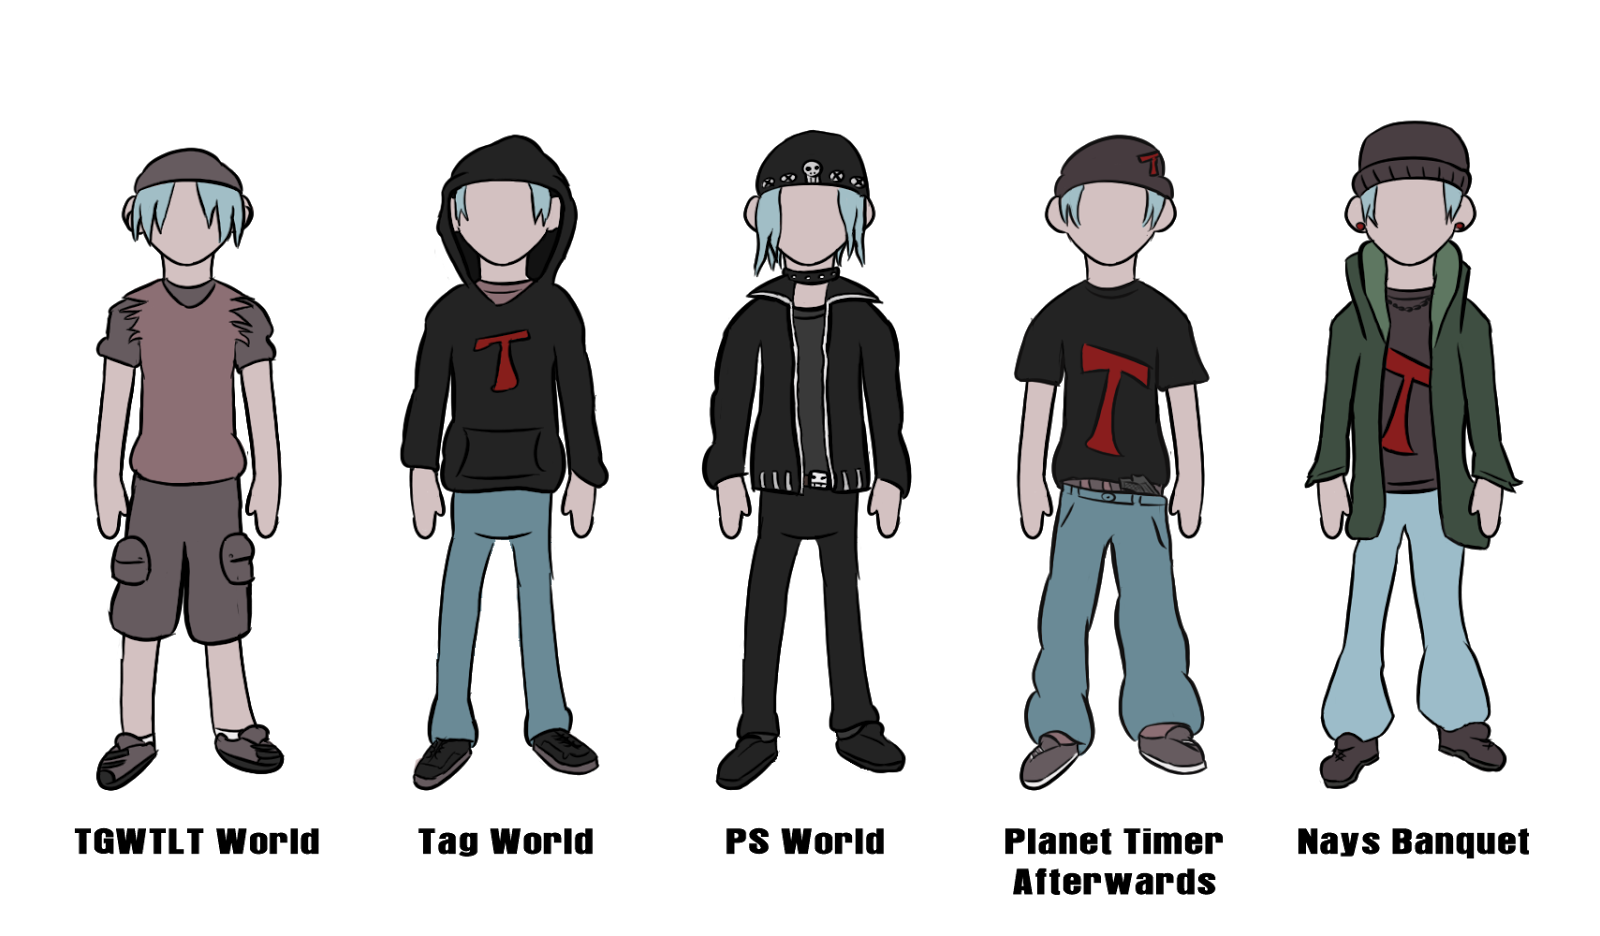
These are clothing designs for two of my characters from The Nays, Shaw Braves and Chozu Eisu. They are two of the original characters from the beginning of the series, so they go through a lot of different designs.

 
And here we have a bunch of minor characters from The Nays. I've continuously been trying to draw every character in alphabetical order, but the series has quite the large cast so I'll probably be working on this until the end of time!


These are scenes from a fun 2-hour animation project I worked on back in September. The goal was to spend no more than 2 hours on each scene.


 For this one, I got inspired to make something using the old Gameboy color palette. This is Mar Keys from The Nays.

These are some new characters from the Shard of the Orient eventure in The Nays. This story is told in a somewhat unconventional way, and you can check out the official website here (the layout and pictures are still not 100% but the story is all up there). It will probably be like jumping into a random TV show on season 4 episode 7, but if you're interested feel free to read it!

And I think that sums up all of the more significant projects of the year. I warned you it would be a long post! Thanks for taking the time to check out all of my work. I don't have a huge following online or anything, but if just a handful of people find some of these pictures interesting, then maintaining this blog is all worth it! I think 2015 was a really great year and I plan to make 2016 even better. See ya guys next year. Until then... Adios!

Monday, December 14, 2015

RPGs and Playstation Experience

Hey guys! Been a while, and I have a lot of cool new stuff to share. I've been keeping busy with game development, 3D animation, drawings, and lots of traveling. I'll save some of the bigger news for my huge year-end post that will go up around New Year's. For this post, I'd like to concentrate on two exciting events that have happened recently: Playstation Experience and the release of RPGMaker MV.


So last week, I got to attend the second annual Playstation Experience in San Francisco. It's a huge gathering of all things Playstation and it was full of awesome game announcements, demos, displays, free goodies, and really excited people. It was a ton of fun and I would definitely love to go back again. As my friends and I described it, the convention almost felt like a mini-E3 that just focused on Sony stuff.

 The event was more consumer oriented than some of the past conventions I've went to, but I still got the chance to meet up with a bunch of fellow developers. I played the new Shadow of the Beast, which surprisingly was really faithful to the original (including some of my favorite songs from the old soundtrack!). I tried Severed (new game from Drinkbox) and was really pleased with how similar the visuals are to Guacamelee. I played Street Fighter 5 and King of Fighters 14, both of which felt like really solid additions to the franchises. (I even managed to win a match of KoF, time to go pro!). 


I also got to play the Uncharted 4 multiplayer which was neat. The booth was set up like a tropical oasis with multiple teams scattered throughout the area. I'm definitely more into the single player campaign than the MP though, so I also made sure to check out the panel with the mocap/voice actors. They went into a lot of detail on what things are like behind the scenes over at Naughty Dog, so that was a really cool experience.


But without a doubt, my favorite part of the convention was getting the chance to try out the Morpheus (or Playstation VR as it is now called). I've used a bunch of other headsets in the past, but none of them have given me quite as mind-blowing of an experience as the PS VR did. First off, you can comfortably use it wearing glasses! Personally, I think that is huge since taking off my glasses to use an Oculus always seems to dampen the experience for me.

Secondly, the sense of space is incredible. I played The London Heist which made use of two PS Move controllers instead of a standard Dualshock. To anyone who still remembers motion gaming as a Wii waggle-fest, let me tell you... this is miles ahead of that! I looked down at my hands with the headset and saw my character's hands. When I pulled the trigger on the controller, my character gripped his fingers. The relationship was one-to-one! There is a part in the demo where a character hands you a cell phone. You can't hear what he's saying until you physically put your hand up to your ear. It was just brilliant!

I know my words can't do it justice but this is something that I feel everyone needs to experience. I was still a little bit skeptical on VR but when you get the full experience with motion controls, it is completely unlike anything we've ever been exposed to before. I can't wait until this thing hits the market!


I could ramble on about the conference forever (in fact, we did over at Final Save Point), but I also want to get to some of the development stuff that I've been doing. A little over a month ago, the new version of RPG Maker officially launched. Named MV, for the first time ever this version supports custom resolutions, mobile/browser builds, and a ton of amazing features through the new plugin system. As you may or may not know, I've been obsessed with the program since RPGMaker 95 and it was what really got me into game development in the first place.


Although it's certainly not as beefy as a full engine like Unity, the program has always had a special place in my heart. And with the ability to go up to 1080p, I can finally develop professional quality games in it! So far I haven't created anything in MV that I intend to release commercially, but I have put together some interesting projects.


In addition to some sample projects to try out the engine, I've created a few games about The Nays. The first is a port of a game I started in VX Ace that can now realize its full potential in the more advanced RPG Maker. The game is about a small detective agency and it's a sequel to a game I made way back in RPGM2003. I'm taking advantage of the quest journal plugin to keep track of cases, and I've already begun work on a custom UI. It's probably my biggest ongoing project in the engine.

I also started up a goofy little baseball simulator called Biggert City Baseball. A long time ago, I used to have this electronic baseball toy that would simulate a baseball game by "spinning a wheel" and coming up with random outcomes when you press the button. I got the idea to recreate that in video game form using creatures that my sister and I designed as part of The Nays universe. I'm envisioning it as a sports/RPG hybrid where you play games of baseball, but in between you can wander around towns and increase your stats / recruit players.


I got really fired up about this and managed to program most of the core gameplay in a single day or two. When a batter comes to the plate, it cycles through a list of outcomes and stops on one when you hit the button. Depending on the batter's stats, they are more likely to get a certain type of hit (power hitter might have 5 frames to hit a homerun where a contact guy only sees it for 2 frames). I'm still tweaking the values, but technically you can play through an entire game and have most of your results displayed on screen somehow. I also drew up the entire field, so progress on this game is moving right along.

Overall, the RPG Maker MV release has been pretty amazing. I've been fairly active over on the official forums and it's been a lot of fun being so involved in the early development of the engine. If you're at all interested in game development and don't know where to start, this is a really great place to get your feet wet.

Anyways, this post is getting pretty long so I think I'll cut it off here. I have a lot more news that I want to share, but I'll save it for next time. I hope everyone enjoys the holidays. You can expect my next post some time in the next few weeks. Until then... Adios!


Monday, October 5, 2015

Lost in Lie Station [New 2Dish Adventure Game]

As I mentioned briefly in the last post, I've recently started up development on a 2Dish adventure game. I created a devlog over at TIGsource and plan to update that quite frequently. I should have a decent number of blog posts about this project in the near future, so I'm creating a separate section about it on the blog. I'll be posting major development updates about it right here, but if you want to see all of the shorter mini-updates as well, check out the TIGSource Devlog. Here's an overview of my introduction post:

Lost in Lie Station


Lost in Lie Station is a topdown adventure game set in a creepy old subway station. You play as Jackie, a mischievous jackalope who gets off at the wrong stop on the subway line. He adventures through various environments and collects boat parts to escape this abandoned station and get back on his journey.


Backstory
Jackie is a luchador jackalope. He is a mischievous little guy who likes to play pranks on people. He comes from a village of equally devious creatures who dub themselves The Liars. When the authorities learn of their troublesome ways, they destroy their home and attempt to throw them in jail. However, The Liars manage to escape and set off on a journey to find The Land of the Liars, a legendary place where the inhabitants can cause as much trouble as they want without fear of repercussions.

(I know... it's a bit of an involved backstory for such a simple game! This is actually based on a story my sister and I created a long time ago. Lost in Lie Station is intended to be a glimpse into the larger story, with only a few of the major characters present. No knowledge of the lengthy backstory will really be necessary to enjoy the game.)

On his way to find The Land of the Liars, Jackie gets on a subway. Unfortunately for him, he misses his stop and ends up at the end of the line... Lie Station. Stranded at this creepy station, he has to explore his surroundings to find a way to get back on track.


Gameplay
The game plays like a top down Link to the Past-esque game. While there is some 'combat' involved, the game is more focused on exploration and puzzle solving. Not to spoil anything, but early in the game Jackie meets a friend who is working to build a boat on the nearby lake. The goal of the game is for Jackie to collect all of the boat parts so that they can use the vehicle to escape the abandoned station and get back to their journey. These boat parts are scattered throughout the environment, and each will require a certain task to be completed before obtaining it.

Graphics
I am creating the art for this game in a somewhat unique style. I wanted this game to look and feel like a 2D game, however (as I learned from my last solo project) creating all of the necessary sprite animations by hand is extraordinarily time consuming. Instead, I've decided to create a good deal of the assets in 3D. By rendering the characters and environments with the proper shaders, I'm trying to achieve a look that emulates 2D. I'm also pulling a Donkey Kong Country with this game and actually rendering out individual frames as sprites instead of directly importing any 3D models. With today's technology, it's probably a pretty backwards approach, but I've always wanted to do a project that way so I'm giving it a try!


Development
Lost in Lie Station is being developed in Unity 5. With the great new 2D options, it was a pretty natural choice. I've learned a lot from the multiple games I've developed in Unity, so this time around I shouldn't run into as many technical issues. I've also purposely chosen to make a game that doesn't rely too heavily around action or physics so that it won't be as difficult for a non-coder like me to program.

Release
I'm intending for this to be a pretty short development cycle (that's what they all say!). I know a lot more about what I'm doing this time around, so I should be able to keep the scope under control. The entire map is already laid out, and there are only 5 boat parts to collect, so I think I can stick to my goals. If all goes well and I have enough time to focus on this, I should probably have things wrapped up early next year. My current goal is to get at least one item off my asset/animation checklist each day. Seeing as it will be such a short game, I don't know that this is necessarily a game that I would charge people money for. My ultimate goal here is to create a fun, finished project that people can enjoy, so we'll see where it goes.


Major milestones thus far
08/25/2015   Started the project
08/27/2015   Finished modeling/rigging Jackie
08/28/2015   Programmed character movement
08/30/2015   Finished essential animations (Idle, Walk, Run)
09/09/2015   Finished environment design layouts
09/21/2015   Finished Lake area assets (grass, sand, trees, water, dock)
09/22/2015   Started this DevLog

I got things moving really quickly right from the start. I managed to get the character fully modeled, rigged, animated, and rendered all in just a few days. I also have all of the map designs done at this point, so I'm pretty happy with how things are moving along. My time since finishing these essential pieces has mostly been filled with creating individual environment assets and adding them to the layout. I'm not working on a strict grid, so lining them up can be a bit of a chore.

Once I get a few more of the essential background pieces finished, I will likely begin work on the game's second major character, Monster of the Lake.

Completion Checklist (Bound to grow as the project progresses, but here's the current status): [Updated 9/30/2015]
Environment Assets: 14 / 37                 
Character Models: 1 / 5 [+2 stretch goal]
Player Animations: 3 / 11 [+1 stretch goal]
Game Mechanics: 3 / 18

Thanks for reading and stay tuned for more updates. Until next time... Adios!