Wednesday, October 5, 2016

My Summer in California

After a long silence, I have returned from California! For those who haven't been following along, I spent the summer at Stanford working as the Assistant Director of iD Game Academy. It was an amazing experience that I will definitely never forget. We had a great staff led by an incredible director, and I truly believe that we provided the 200+ students with an unforgettable summer.


One of our Brazilian exchange students summed it up best:

"I can just say that it was one of the best experiences of my life! In my opinion it is much more than game designing or coding, all the moments that I experienced here will be on my memory forever."

It is comments like this that make me feel like I actually made a difference, and I am so satisfied with the way the summer turned out. I have taught many classes with iD Tech in the past, but none of them have compared to the connections formed during the two-week sessions at the Game Academy.


One of my favorite parts of the summer was the industry tours that we got to go on. Our first one was at Crystal Dynamics. We had multiple speakers walk us through their daily schedules as they work on new entries in the Tomb Raider franchise. Their office is remniscent of the recent games in the series, with driftwood decor and all sorts of areas build from 'found material.' It was a very cool work environment!


We also got the chance to visit Ubisoft and Google. They offered great tips to our students on how to get started in computer science and what type of schools they should go to. Both trips were very valuable, and it was fun to see some of the crazy campuses that these companies have. Google even has a dinosaur fossil right in the middle of their courtyard!


My favorite trip though was our tour of NVIDIA. We got to see all of the new technology that they are developing to be used in self-driving cars. Our speaker explained how their machine-learning program works and even let us try it out. They had a camera set up and we could put objects in front of it and the computer could tell you what that object was just by scanning the image. It felt like stuff out of a sci-fi movie! At the end of the tour, they also had this amazing industry round-table session where 20 or so of their employees came out and sat at small tables to have casual conversations with the students.


We were so impressed by round-table idea that we later held a similar session of our own as a "career fair" of sorts. I gave a talk about being a freelancer and how to succeed in an unconventional line of work like that. The students were extremely receptive to it and asked me a lot of great questions.


I also got the opportunity to use our 3D printer when the students weren't using it. Getting the prints to come out perfectly could take some trial and error at times, but it was very neat to see our designs come to life in the physical world.


This is my Haca Fairstalk character that I have written about in many of my past blog posts.


Once the super hectic camp season came to a close, I took a few days to see the Bay Area sights before coming home. (No exaggeration, I literally worked 100 hours each week so I had very little time to explore during work!) As much as I enjoyed the work, it was nice to have some time to unwind and visit some new places.


In my week off, I climbed Mission Peak (tallest mountain in the Bay area), I visited some of the cool sights in downtown San Jose, and I finally stepped into the Pacific Ocean in Santa Cruz.


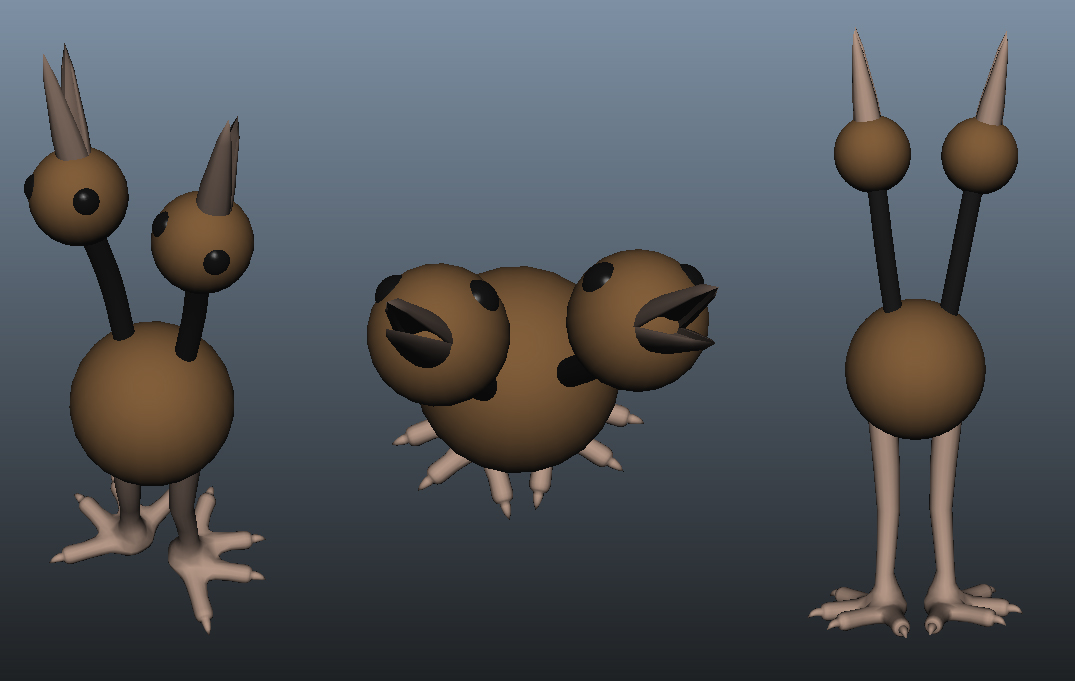
After such a busy summer, it has taken me a little while to get back into my regular routine, but after a few weeks I've slowly eased back into my own game development again. To help me get into the swing of things, I've started up a little project involving this guy: Doduo, the two-headed Pokemon. I have been focusing a lot of my recent efforts on rigging in an attempt specialize on the more technical aspects of the character development pipeline. However I realized that most of my rigging work has been on traditional two-legged humans, so I wanted to break that up with a few unconventional bone structures. What better way to do that than to model and rig some of my favorite Pokemon!


After Doduo, I plan to move onto some 4-legged creatures like Vaporeon and Umbreon. I'd also like to do a winged creature and a swimming creature, so Mandibuzz and Seadramon (Digimon not a Pokemon, I know!) are on the agenda as well. And if I still feel like doing more after that, I plan to tackle Infernape, Ursaring, and maybe Agumon. It should be a fun project, so I'll be posting about that soon.


I have also been spending time on a personal RPG Maker project called the Knalsy Experience. It is a remake of a game I made all the way back in RPGM2003. It is mostly just for fun, but it has been a good way to get focused on game dev again.

All in all, my summer in California was a huge success. Thanks for reading this super long post. Future updates should be shorter and more frequent again. Until next time... Adios!

Friday, June 10, 2016

Onward... to Stanford!

Not sure I've mentioned this on my blog before, but I recently got hired to be the Assistant Director at the iD Tech Gaming Academy at Stanford. Although the company isn't really affiliated with the school itself, I'm still excited that I'll be working at one of the most prestigious schools in the country. This will be my third summer with iD Tech and I can't wait for all of the exciting challenges that I'll face in my first true management position. On top of that, I'm beyond stoked to be heading to one of my favorite places in the country - the San Francisco Bay area. I'm sure I'll have lots of interesting adventures to talk about once I return from the West Coast.

As such, I'll probably be pretty quiet on this blog for the next few months. I've suspended all freelance work until September and I likely won't have much free time to draw or model during the summer. I should still be somewhat active on Twitter though, so feel free to follow me on there.

Before I leave, I do have a couple pieces of art to share. Finally got some time to do a few personal drawings of The Nays. I also made more progress on my Haca Fairstalk project. I wasn't able to completely finish it by summer like I originally hoped, but I guess it just gives me something to look forward to when I return.


This is my character Murou. He's really into MMOs and The Nays actually first met him inside a virtual world. Pretty quick drawing but it was fun to play around with the glow of the computer screen.

Another one of my characters from The Nays, this is Meushi. She's an archaeologist who studies ancient Tag World technology.

Lastly, we've got a scene of Spicco and his adopted "son." This was based on an old drawing that my sister did when we were young, so it was fun to revisit that. Overall it was a good experience to start drawing for myself again. None of these were super detailed but it helped to get my creative juices flowing again.


I also had the chance to model Haca's weapon for my Unreal animation project. I modeled the spear in Maya and used Substance Painter to add in all of those texture details. I plan to animate the cloth using APEX cloth physics so it should flap around during animations.

I've been loving Substance Painter a lot lately, so I also decided to give Substance Designer a whirl. This was the result of an in-depth tutorial I followed. I really like the way the puddles turned out in between the rocks. Amazingly is is all completely procedurally generated so any aspect of the material can be tweaked and adjusted with sliders.

This is the crazy graph network that I set up to create that material. There are so many little aspects that go into a design like this, so it took a few hours to get it all in place. It's really nice though because it works similar to the UE4 material editor and you can produce amazing shaders without having to type a single line of code.

That's about all I have to show this time around. I'll be sure to keep you up to date on all of my crazy West Coast adventures in the coming months. Until then... Adios!

Friday, April 22, 2016

Designing New Drone Enemy [Haca Fairstalk Animation]

Just got back from California and I'm ready to get back to work on some new artwork. For those that didn't know, I spent the past week in San Jose teaching kids about Maya at iD Tech Camp. My students were very advanced and we got through a ton of content in such a short time. We went over modeling tools, animation, lighting, cameras, Mudbox, and even some UV mapping. And best of all, I got the chance to play with a 3D printer! It was a super fun week full of friends new and old, and now I'm even more excited to spend the summer at the iD Gaming Academy at Stanford.

With this re-invigorated passion for 3D modeling, I got right back to work on my Haca Fairstalk project. I promised more frequent bite-sized posts so I'll keep this somewhat short.

As part of the animation, Haca is running through this tattered junkyard doing all kinds of acrobatic flips and maneuvers. I wanted there to be some kind of conflict but creating another full character would be too time consuming. So instead I got the idea of some kind of small but destructive robots. I've been wanting to create more hard surface models with complex mechanical rigging, so an attack drone seemed like the perfect solution.


I scoured the web for all kinds of references and came up with these sketches. This drone is called Divith Geiger 107. I want it to have some elements of horror sci-fi while still maintaining believable mechanics. It has a hard layered shell on top which houses an eyeball camera on a crane. Below the body, it carries a high powered rifle for picking off its targets.


After coming up with the design, I put together a prototype in Maya using primitive shapes. This is to help visualize some of the movements that the propeller makes.


Here is a short playblast of the propeller retracting into the base of the drone. Probably going to scale up the size of the blades.

Next on the agenda is creating primitives for other movable parts and then I can move on to the actual models for the drone. Next post should be a bit more visually appealing so look forward to that. Until next time... Adios!

Tuesday, April 5, 2016

New Character Project - Haca Fairstalk

Hey guys, today I wanted to share a project that I've been working on for the past month or so. I've been transforming one of my existing characters into a 3D model, and I'm planning to create a short animated sequence of her. The end goal of this project is a full scene running in Unreal 4. It should be pretty cool, so I hope you'll stay tuned to check out all of my updates. I have a ton of images documenting various stages of the process, so this will be a pretty meaty post. For future updates, I think I might try making frequent bite-sized posts every few days to show my progression.

With this project, I have a couple of major goals. For this character, I am trying my hand at a number of new current-gen techniques that big budget games usually use. For starters, I wanted to utilize Substance Painter and incorporate a PBR texture system. That means roughness maps, metallic maps, microsurface, etc. I also want to shoot for a slightly higher polycount than I'm used to. I was trained to be very restrictive with my resources, but as hardware evolves to accommodate higher polycounts, it's important to utilize those resources to improve the quality of your work. Currently I'm at 26k triangles without major accessories/weapons, so that's quite a bit higher than I'm used to working with.

Additionally, this project will incorporate various physics techniques using Nvidia's GameWorks plugins. I learned a lot about APEX cloth physics on some of my recent freelance work, and now I'd like to add it to a project of my own. I have also been experimenting with HairWorks and plan to use that on the character as well. And of course getting it all working in Unreal 4 should be a good test of creating game-ready content. Without further ado, here are some of the progress shots.


I started things off with a concept sketch. Luckily the character had been previously designed (including this awesome picture my sister drew), so this stage was mostly about getting the shapes down and creating a good reference.


From there I modeled out the torso. I took extra care to properly capture natural curves and make sure that the edge flow followed the shape of the body. This step is incredibly important, and I'm very happy with how I created the initial geometry.


Next I modeled the arms, legs, and face. At first, I felt some of these shapes looked too blocky and unnatural. Maya has some built-in sculpting tools that you can use to relax geometry, but instead I decided to toss the model in ZBrush to quickly smooth out some rough spots.


I planned for Haca's boots and shirt to be directly built into the main model, so once I finished UVing, I quickly tossed on some stand-in materials to separate the clothes. It helps to visualize the finished mesh a little more than using that standard grey material.


Next came the belt and skirt. Since the skirt will be controlled with APEX cloth physics, it has to be its own separate model. I experimented with a couple of different styles before deciding on that slightly ruffled look.


After modeling some jewelery, I took Haca back into ZBrush to add in some more details. You can see her collarbone and some of the muscles in her neck and abdomen now. I also did a lot of work on her face to make it less lumpy and more defined. For this stage I used a lot of references of real models.


At this point, the model is ready for texturing. I took her into Substance Painter and started creating a skin shader. It's not super visible in this shot, but there is a subtle layer of roughness on the skin that helps to highlight the pores on human skin.


I spent quite a bit of time in Painter to hammer out those details. From the fabric of her skirt to the edges of her fingernails, I really wanted to go all out to capture all of the minor aspects of a human character.


 Those details are highlighted by things like lace holes on the boots and corset and various stitches and leather textures.


I even made sure to give texture to the strings themselves, using height maps and painted shadows. These are details that you wouldn't really catch from a distance, but they add to the overall believe-ability of the model.


For far too long, I was using a basic stand-in texture for the eyes. I think eyes are incredibly important in creating lifelike models and it is an area that I often struggle with. However with the added reflectivity and amount of detail that I painted into the cornea, I think I managed to shift this further away from the cartoony spectrum that I often fall into.


After finally calling the texturing done, it was time to move onto to rigging. To help speed along this process, I tried out Unreal's Animation and Rigging Tools. While there were still a lot of corrections to make and weight painting to do, the automation helped speed up some of the more tedious parts like plotting out the individual joints. There aren't a ton of interesting visuals to show for the rigging process, but now I can put Haca into all sorts of goofy poses!

This is pretty much the current state of the project. With the character modeled, UVed, textured, and rigged, most of the remaining tasks are animation based. I will be modeling a spear for her to use and then moving on to skirt physics and creating hair. I have already started gathering video references for a lot of her movements, so the next post should be fairly animated and exciting.

I hope you enjoyed this glimpse into my character design process. This is one of my favorite personal projects I've worked on so far, and I'm excited to see it all come together in a big game engine. For the next 10 days or so, I will be occupied with teaching Maya classes at iD Tech (working at Spring Break Camp in California again this year!), but once I return I plan to post more frequent updates of this project. Until then... Adios!

Monday, February 29, 2016

Leap Day Art Update

Happy February 29th everybody! I almost missed making a blog update this month, but luckily we were gifted with an extra day this year.

So far, I've been pretty good about my New Year's resolution of setting aside time to do personal artwork. I've got a pretty big 3D animation in the works for my portfolio, but that one isn't quite ready to show off yet. I ran into a bit of trouble between my tablet and Substance Painter, so I've got a new Wacom on the way. Expect a big update about that project next post.

For now, I wanted to show some of the 2D drawings that I've been doing. For my first drawing of the year, I decided to make something a bit bizarre. I was going through a list of game ideas that I jotted down one day, and I came across this idea about a 2D fighting game where everybody looks like they were made out of paper. Everyone would be drawn on notebook scraps and have a traditional style. I don't think I'm going to take on a project of that magnitude any time soon, but I figured it would be fun to draw a quick mockup character.


Continuing the traditional artwork trend, I drew this picture of Chozu one night with an ink pen and a sharpie. I've always been impressed by the amazing things that people can do with pens, especially manga artists. Having those pure blacks gives a really nice contrast, so I looked up some references and decided to create a fake comic book page. Something else should probably go in that bottom corner, but I'm rather satisfied with this one so I'm a bit scared of messing it up by adding more to it. There's no ctrl+z when you draw on paper!


I decided to do some more pen & ink after that with some Pokemon. I've been really into the whole 20th anniversary celebration, so I recently replayed Pokemon Fire Red. After that, I decided to draw the team that I used in the game. I did a similar piece with Pokemon Black a few years ago when my tablet was broken, so I thought it would be nice to use a similar style. I drew this first on paper, scanned it, and colored it in Photoshop. Heavily inspired by the original Ken Sugimori concept art and his use of watercolors.


Clearly that wasn't enough Pokemon for me, as I then moved onto Pokemon Crystal on GBC. For this one, I decided to go purely digital so I could have a bit more control over things. Instead of a static team photo, I went with a full scene. This is the gang encountering (and capturing) the legendary Suicune inside the Tin Tower at Ecruteak City.


It's been a while since I did a full scene with so many characters, so this took me a bit longer than expected. Overall, it was a lot of fun though. I always love when artists show their process, so below you can see the all of the different phases I went through. That first sketch sure was messy...


 Because I have different heights and distances in the scene, I decided to experiment with some depth of field. I think I could probably get this looking a bit better, but it was sort of just an after thought I decided to play with at the end.


Speaking of extra features, I also thought it would be fun to animate this scene a little. This picture wasn't really made for animation, so don't mind the weird gaps that appear in some places. But I thought it might be fun to move some of the layers around to highlight the fact that it's on a bunch of different planes. This is the kind of subtle animation you might see in something like a motion comic.


Anyways, that wraps it up for this month. It has been nice to take some time to draw for myself again. I should have my new tablet this week, so expect to see a pretty big post about my new 3D project next month. Until next time... Adios!