Sunday, December 31, 2017

Onward to 2018!

Hey guys! Happy New Year! I may not write a ton of blog posts throughout the year but I always find the time to do a reflection of the past year. I set quite a few goals for 2017 and I want to take a moment to look back and see how I did. I see a lot of people talk about how they can't wait for the year to be over, but 2017 was actually really good for me. In addition to a bunch of really great games releasing across the industry, I went to California 3 more times (February Break Camp, Spring Break Camp, full summer at Stanford), I went to my first ever E3 in LA, I went on a fun trip to Las Vegas, and I got a full time 3D Multimedia Designer job. It's been quite the year!

I also created a bunch of artwork. Working 40 hours a week in a creative position, I haven't been doing a ton of freelance jobs lately. But I've still gotten around to doing quite a few fun personal projects. Here are a few of the drawings and renders that I neglected to post throughout 2017.


This was a self-imposed art test that I did when applying to my current job. Tooling-U focuses on a lot of manufacturing equipment, so I grabbed something from my Dad's inventory to model. It was a fun project that seemed to really help my portfolio.  


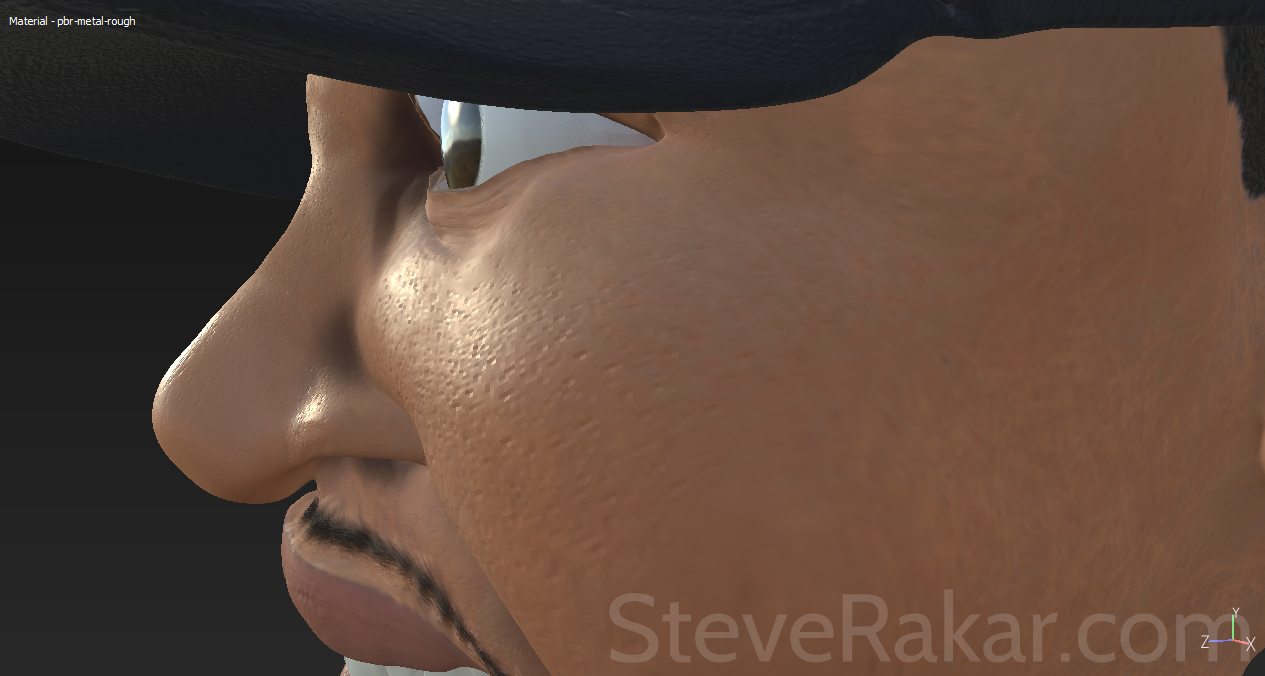
Back in the Spring I was putting together the concept for a UE4 action game about The Nays. I did a lot of research into cel shading and managed to incorporate some neat game mechanics like character swapping. It's still just a prototype so there's not a lot to look at, but this was one of the model sheets that I did for the main character. I wanted a more anime look than my normal style.

Next we have a bunch of The Nays character designs and sketches I did throughout the year. Going through these now makes me realize just how many drawings I did that never made it onto this blog (or anywhere on the internet, for that matter). In 2018 I definitely want to do a better job of making sure I post everything that I draw, whether that's a formal blog post, in my deviantART gallery, or simply in a short tweet on Twitter.


Just some doodles of The Nays.


Scroll, a character that The Nays met on the Color Tribes Eventure. He eventually becomes a Nay himself.


A couple of antagonists that The Nays encounter during the Celedel Ruins Eventure.


A comedy troupe / undercover activist group that some of The Nays meet in Aiml World.


The antagonist from Inferno Colony No. 3. For a fun comparison to his old design, check this out!


JrTr is one of the main characters of The Nays and he has been in need of a redesign for a while. These were a bunch of concepts I did when trying to come up with his new hair style.


Summer is the newest Nay that I created for the Aiml World Eventure. I spent a lot more time designing her than I do for most characters, so it was a pretty intense process.


For my sister's birthday, I made a Persona 5 inspired animation about The Nays since we were really into the game at the time.


A still from another animation. This one was about the very first Nays story, The Gek Eventure. All of The Nays journey inside The Gek's Coat, which is a giant gravity-less fun land with ice cream and a casino.


I'd say that's a pretty good summary of the year. Now let's take a look back at my goals.

2017 Goals Review

More Tutorials    (Success!)
I did a ton of tutorials throughout the year! Between my SNES tutorials, learning about Genesis music, and my new love for Cinema 4D & After Effects, I learned a lot of new stuff in 2017.


 ZBrush / Substance Painter Combo     (Somewhat Success)
I didn't spend quite as much time as I thought I would on this, but I still spent some time using the pipeline so it's a partial success. Bonus points for the all of time I spent learning Substance Designer!

More Rigging     (Somewhat Success)
Like the last goal, I wouldn't say I spent an extraordinary amount of time rigging, but I still spent a good bit of time on it in 2017. I'll share some of the cool rigging experiments that I did in a future post.

Overhaul My Website     (Failed)
I did the opposite of this in 2017... my website actually completely broke. I haven't had the time to really dive into this and it's clear that I still need to do a TON of work on re-coding my site so this is a major goal for 2018.

Shorter, More Frequent Blog Posts     (Failed)
This is post number 7 of the year, which falls pretty close in line with my average yearly blog post count. I started off strong in January but tapered off pretty quickly. I expected this one to be the toughest goal though so I'm not too disappointed in myself. I'll try this one again in 2018.

Overall, I don't think I did too bad with my goals (especially considering there were 5 of them). I think the tutorials one was the most important so considering how many new skills I learned, I feel that the year was a success. I still need to post that SNES Programming tutorial that I keep mentioning so look forward to that next year. Speaking of next year, let's move on to...

2018 Goals

So my goals for 2018 are going to be a bit different. Yes, I still plan to fix my website and yes I will always be trying to post more on this blog. But my official goal for the year is something unusual and not even art related at all.


In 2018 I want to learn how to read Japanese! A good portion of the games and TV shows that I enjoy come from Japan and I can't even count how many awesome things I've had to miss out on because I don't know the language. So I want to finally do something about that. Over the past month or so, I have begun learning Hiragana. It has been going pretty well so far but I still have a long road to go before I become even close to fluent.

So by this time next year, my goal is to be competent enough in the language to at least play through an entire Pokemon game in Japanese. I hear those games use pretty simple language so it will be a great beginner test. If all goes well, I also plan to take a trip to Japan at some point in 2018. Wish me luck on my studies!

And there we have it. Another year in the books, another year of lofty goals and self improvement. I hope all of you enjoyed 2017 as much as I did, and I hope you have an even greater 2018. Thank you so much for taking the time to read all of my ramblings. Until next time... Adios!

Thursday, October 19, 2017

Website Downtime

Hi guys! Mini update time. Yes, I know that my website is currently having issues. As far as I can tell, one of the scripts that my website was depending on seems to have gone offline. I was planning on doing some changes to my website design in the near future anyways, but this means that I'll have to do a major overhaul of the backend. As I plan how I want to redesign everything, it may be a few weeks until the site is fully operational again. For now keep an eye on this blog for updates and if you need to contact me feel free to send an email to steverakar [at sign] gmail [dot] com.

In other news, I recently started up a new fulltime 3D artist job at Tooling U in Cleveland! I have been doing a lot of work in Cinema4D which surprisingly has a few advantages over Maya. I can't post a ton of the art that I do at work online, but expect to see at least a few renders in the near future.

(And I know I keep saying it, but that SNES development post really is coming soon! I have a lot of it typed up (and even saved on blogger!) but I still need to format it and make it easier to read. I definitely intend for it to be my next post)

Anyways, just wanted to post this short update for anyone who comes across my website and wonders what's going on. Until next time... Adios!

Thursday, September 7, 2017

Learning Music Production with Blast Processing

Hey guys! Long time no see. Don't worry, I haven't forgotten about this blog. I've been busy working on a super long tutorial post that I hope to share with you very soon. If you've been following me on Twitter, you'll notice that I have been spending a lot of time learning about ASM and programming games for the Super Nintendo. I have been organizing all of my findings into a mega post that both shows off what I have created as well as teaches people about SNES development themselves. So that should be done soon.

I also spent another summer working as the Assistant Director at the Stanford iD Game Academy. Since most of what I would share about that would be similar to my post from last summer, I'm not going to go into too many details. Just know that it was a lot of work and a lot of fun!

In the meantime, I want to share a fun little project that I have been working on the past few days. I took a brief side quest from SNES development to spend some time on the dark side and try out a little Sega Genesis development. It all started when I stumbled upon this excellent video about how Genesis music was created back in the 90s. I was curious, so I decided to download the GEMS software that musicians used back then.


As expected of a pre-Windows program, it was very clunky and hard to use. I had to load the software in DOSBox and even then I couldn't get it to actually function correctly. Based on my research, it seems that GEMS needs to be connected to physical Genesis hardware before you can really do anything.


Just as it seemed like I was about to reach a dead end on this little adventure, one of the kind folks over at romhacking.net suggested that I check out a more modern program called DefleMask. This awesome software can emulate the soundchips of many different retro consoles, including the Genesis, NES, GameBoy, Master System, and more.


Unlike most music production software, this one scrolls vertically instead of left to right. You have multiple channels that can each store its own sound. You also segment the song into sequences that each contain a particular beat. The software comes preloaded with a lot of instruments, many of which come directly from Genesis games. If you're feeling adventurous, you can also make your own. It is a much more technical approach to sound production, but I actually found that to make more sense to me than traditional music software.


I don't know the first thing about creating music, but I played around with the program for a few days and put together something that sounded decent. Instead of just uploading the music by itself, I also ended up creating a short animation to showcase the song. Check it out!


Streeka Unchained - Sega Genesis Intro from Steve Rakar on Vimeo.


The goal of this animation was to emulate an opening title sequence for a Sega Genesis game. I tried to pick colors from the actual Genesis palette. I also used an old school dithering style for most of the shading. The fonts came directly from the Genesis logo itself, and I added a very 90s themed metal gradient to it.


I created the text reveal animation in about 12 frames for each word. I actually worked backwards from the last frame and erased the letters as I went, adding in erratic lightning bolt squiggles with the pencil tool. As for the thunder sound effects, I sampled from both Jurassic Park and Gunstar Heroes on the Genesis, tweaking the pitch and tempo in Audacity.

Overall it was a fun little project that took me back to the days of funky basses and blast processing. It was a great way to jump back into retro game development after a summer of teaching modern software. I would love to learn more about music creation someday, so this was a nice first step. Anyways, hope you enjoyed this post and feel inspired to try out the software for yourself (DefleMask is free!). My next post should be that meaty SNES tutorial that I promised so stay tuned. Until next time... Adios!

Monday, March 6, 2017

Digimon, Digital Monsters!

Hey guys, two weeks ago I got the chance to teach the first 3D printing course of the year at iD Tech's February Break Camp. I had a lot of fun and brought back a bunch of cool 3D prints... but I also brought back a nasty cold. While recovering last week, I watched a lot of old Digimon episodes and played Digimon Cyber Sleuth on PS4. And so I thought a fitting project to get me back into my regular schedule would be a simple Koromon model.


It's fun to view the process of how things are made, so I'm going to quickly walk through each major step below.


I started things off with a simple sphere. Gave it a decent amount of geometry so I would have enough polygons to work with comfortably.


From there I made use of the Soft Select tool to easily mold it into shape. Koromon is wide on the bottom and a little bit flat. He is also somewhat lumpy shaped.


"Drew" out the shape of a smiling mouth with the front few faces and I extruded inwards a few times. I took some of the faces from the inside of the mouth and moved them upwards into a tongue.


Did the same with the eyes to give them their roundness. I added in a few divisions to better round out the shape.


From there I did some more extrusion magic and sculpted in the eyes. I wanted them to sort of bulge out of his head so I pushed them pretty far.


Lastly, I extruded out his little ear antenna thingies. I thought about adding in some more divisions here, but the low geometry give them a nice floppiness that actually works really well.


After that, I took him into ZBrush and corrected some of the shapes. I really like the crookedness of Koromon's mouth so I had to make sure I got the angles of his lips just right. The Move Topological tool works great for that.


After tweaking his model in ZBrush and modeling in some teeth, I imported Koromon into Substance Painter to do some texturing work. There isn't a ton of detail in his texturing, so this went fairly quickly. The eyes were probably the toughest part.


And finally, I rendered out a few shots with nicer lighting. Overall, this was a nice fun project that only took a few hours. It was refreshing to take a model from start to finish so quickly. As always, thanks for reading all the way to the end. Next post will focus on something a bit lengthier. Until next time... Adios!

Monday, January 30, 2017

Global Game Jam '17 Writeup - SOS dot WAV

Hey guys, I'm here with my third blog post of the month. I thought I was setting some kind of personal record, but I realized I had 6 posts between February and March 2014. I guess I have a lot to live up to! I felt very inspired reading old posts and I really want to keep this frequent posting thing up throughout the year.

Today's topic of discussion is Global Game Jam 2017. For those who don't know, GGJ is an annual event held every January where developers from all around the world come together to make video games. It's not a competition so much as it is a challenge. There is a universal theme that everyone has to use in their game, and you get 48 to develop the game from start to finish.


This was my 4th time participating in the event, so I had a pretty good idea what to expect. This year, I collaborated on a project with my sister, Michelle Rakar. We developed a short adventure-puzzle game called SOS.WAV using RPG Maker MV. (You can check out our submission page and download the game right here) Our project last year had some complex mechanics with a lot of maps and the framework to be a pretty large game. Although the idea was cool, as a prototype it wasn't all that nice to look at. So this year, our goal was to create a more compact yet polished title with all of our own art assets.


The theme of this year was "Waves." We figured most jammers would make games about the ocean or even the act of waving, so we tried to think of an outside-the-box way to approach the theme. We came up an idea centered around the computer extension ".wav" and made sound files an integral part of the game. (Kinda punny, but it was a pretty unique interpretation).

SOS.WAV takes place on a remote island from our fictional universe, The Nays. You play as Mr. Dude, who is taking a break from all of his stressful duties as World Leader. He comes across a mysterious SD card that washes up on shore. After plugging it into his phone, he discovers that the only thing on the SD card is a single file named 'SOS.WAV.' Listening to the sound clip reveals that someone nearby is in danger and needs his help. The sound file also gives hints on how to solve the puzzles of the island.


We created an interesting mechanic in order to deliver help to the player. You can listen to the sound file at any time, but some of the hints are too fast, some too slow, and others reversed. You won't be able to understand the hints until you unlock the proper playback upgrades for your phone. This took a bit of sound editing to create, but it was really fun to see the mechanic come together.


Overall, there are 4 puzzles (well 3 and a half, the first one isn't very difficult) on the island, and it is mathematically very hard to solve them without first hearing the audio clues. This provides a nice gating feature to prevent the player from breezing through everything, but also gives the player the freedom to try and solve the puzzles by guessing. I think the puzzles are pretty diverse so I'm happy with the interesting designs we were able to come up with in such a short time.
 

The majority of my time was spent drawing out the backgrounds. As you might imagine, making a bunch of full blown tilesets in a single weekend is virtually impossible, so I instead created parallax images in Photoshop that could then be placed in to RPG Maker as a single image. The style is a bit simple, but it was the perfect amount of detail for the time constraints. Even with the shortcuts, it still ate up most of my time. I also worked on design elements, puzzle mechanics, and sound editing. Michelle was responsible for character animation, character portraits, dialogue and all of the UI elements (plus a lot of the design brainstorming too!). I think we split up the work pretty well.


To better suit the parallax background style, we also tried out a plugin that breaks free from the grid of RPG Maker. One of our goals was to avoid that stigma of being "just another RPG Maker game" so we really wanted to push it as far from the stereotypical RPGM look as we could. This multi-directional movement script helped a lot with that and setting up collisions wasn't as difficult as I expected.


All in all, I was really happy how our game turned out. I dare say it is the most complete and polished Global Game Jam project I have submitted so far! GGJ is a great event and every year that I participate, it reminds me of how much I love developing games (...even if it means not sleeping for an entire weekend...).

Words and screenshots only tell you so much though. To really experience the game, you have to play it for yourself. A download of SOS.WAV is available on our itch.io page. It is completely free to play, can be completed in roughly 15 minutes, and should run on just about any Windows machine. Give it a try and let us know what you think!

Hoping to continue this schedule with another new post soon. I have a few ideas brewing about what to cover next, but I'm not sure which one will be next yet. Right now I'm thinking about either explaining the cel shading techniques I'm using for a current UE4 project, talking about my adventures in SNES programming, or trying my hand at a process video where I demonstrate how I develop 3D characters. Let me know if any of these topics sound interesting to you in the comments section. Until next time... Adios!

Wednesday, January 11, 2017

Sculpting Francisco Lindor

What's this? Two blog posts in one month? I promised more frequent posts and I'm going to stick to it! Rather than a big dump of lots of different projects, I'd like for my next few posts to be more in-depth pieces where I walk through my process for a single project.


So the first of this series is a sculpt that I created of Cleveland Indians shortstop Francisco Lindor. If there's one thing I love as much as game development, it's baseball. I picked Lindor not only because he's one of my favorite players, but also because he has unique facial features.


Starting things off... this doesn't look very much like him. I started off with a very basic human mesh in Maya with plans to tweak the facial features in ZBrush. I have used this base on multiple projects since I like the way I set up the geometry and it works as a starting point for lots of different characters. The bust is quite low poly, weighing in at 3216 tris.


The UV mapping on this is a little different from my usual approach. I wanted to make sure that the mouth had plenty of room for detail (especially because I planned to sculpt in the teeth). So I cut the mouth area into its own shell. Normally I would try to only have seams in less visible areas, but since I planned to do all of the texturing in Substance Painter, I knew I'd be able to effectively hide those seams. At this point the eyes were actually part of the head mesh, but in order to expand the detail, I eventually cut the sockets open and created new meshes.


After modeling the initial base mesh, I took it into ZBrush for some refinement. As you can see, I made major structural changes to the face. Francisco Lindor has a very unique lip curl when he smiles, so I wanted to make sure to capture that. Since this sculpt isn't intended for animation or game usage, I can go all out in sculpting the facial expression.


After a few hours of sculpting in ZBrush (about 6 and a half, in fact), the face is starting to take shape. Even though ZBrush has tons of interesting brushes, I do almost all of my work just using the Standard, Clay Buildup, Dam Standard, and Move Topological. For the hair, I switched my brush style to "spray" and used one of the busier looking alphas. Since I gave a lot of space to the hair on my UV map, I was able to get some good detail in that portion of the sculpt.


Next comes the surface details. For this, I experimented with the layers function in ZBrush (possibly the first time I've ever touched it!). It was super handy in letting me keep all of the changes on a separate area that could be hidden or adjusted. As you can see, I added in the skin pores and lip cracks at a very high intensity. With layers, I could then tweak that visibility to get it down to a more subtle and realistic rate.


This is usually the tedious part where I have to bake out maps and retopologize the model to get it game-ready. Again, since this isn't going to be animated, I get to skip this part and continue working with the high poly model. For comparison though, I did export out the low res version to compare it with the base. Both models pictured above are using that same 3216 triangles, but as you can see the shape is now much different.


Now comes my favorite part - texturing the mesh! From here I bring my model over into Substance Painter to paint on all of that texture detail. I start things off by creating a fill layer across the whole model that will be my base skin layer. (I can't find the exact link to the one I use, but it should be linked in the official Substance tutorials if you're interested)


After the initial base layer is down, it's time to start adding some variation. I paint in the temperatures of the face. Generally the cheeks, nose, chin, lips, and throat have a warm reddish hue. Cold parts like under the eyes, under the nose, and under the lips get blue. Here's a good reference from Martin Guldaek that might help. After painting in those colors, it's important to blend them. I make another new layer with a slightly lighter skin color and start painting all over the face with a scratch alpha. This is referred to as "noodling." Once I'm satisfied, I fiddle  with the opacity sliders until I get something that looks nice and blended.


Once the skin starts coming together, I go to work on the mouth. I make sure to paint the gums before the teeth so I can be a little bit messier with them. The teeth are nearly a pure white with a super low roughness to get that shininess to them. Finding the right color for the lips can be a bit of a challenge, especially with a male character who is not wearing lipstick. You want something that stands out from the skin, but not too much that it looks unnatural. I used a pressure-sensitive opacity and blended a lot of colors together to get that nice salmon hue.


Now it's time to fill in the hair. Like the skin, I first put down a very basic fill layer. Frankie has pretty dark hair, but I used a slightly desaturated brown just so all of the details didn't get too washed out by the blackness. After that, I created an alpha of the part of the mesh colored with hair and used that as a mask. On my new mask I used a repeating curly hair texture and set it to my height map. This adds in a lot more fine details without having to physically go in and paint them by hand.


Once I toss the hat on and give the uniform some color, he actually starts to resemble the ball player we know and love. This part was a bit tricky to paint as there wasn't a ton of geometry detail down in his shoulders. Had this been a full character I wouldn't have ran into this challenge, but since I put most of the detail in his face it was a bit hard getting sharp lines on the shirt divisions.


It was a tough call deciding which uniform colors to go with. I'm not terribly fond of the block C logo, but I like that off-grey color of the away uniforms so I went with that 3rd color scheme.


Next I went back and worked some more detail into the skin. Something really important in PBR texturing (physically based rendering, not the cheap beer) is the roughness map. Painting this gloss texture in allows you to see all of the really fine details when the light passes over them. I made sure to plug in my roughness layer with my skin pores so that you get the really nice fine detail when you move the light around.


At this point, it's basically just putting in the finishing touches. After painting Lindor's facial hair, I went in and gave him eyebrows. (Amazing how alien a character looks without them!) I also painted some darkness onto the eye lash area, but I was careful not to go overboard and make him wear eyeliner. Lastly I pushed some of the shadow areas around the eyelids and in the nose crevices. I generally try to avoid painting in too many shadows unless I'm specifically going for a hand-painted look, but a little bit of darkness in these indented areas goes a long way.


Added the logo to the cap, modeled in Frankie's signature necklace, and added in a few more clothing seams. At this point, I decide to call him done. I could probably still tweak this thing for hours and hours, but it's important to know when to call something done. I wanted this model to have a quicker turnaround, so at this point I export out all of my textures and finish up.


After exporting everything out of Painter, I bring the model into Marmoset Toolbag for some fancy rendering. Toolbag has a lot of excellent lighting presets to view your model in different environments. I would definitely recommend it as a good way to showcase your models without dealing with lengthy light setups and rendering times.


It also has a lot of fun post processing effects that I like to play around with. It can be useful to view your model in different lighting, but most of all it's just plain fun to check them out.

All in all, I spent about 18 hours on this model. I didn't set a strict timer like I do with my freelance work, but I wrote down estimates at the end of each day. Here is a basic breakdown if you're interested:
  • Maya base modeling: 1.5 Hours
  • ZBrush sculpting: 6.5 Hours
  • Substance Painter texturing: 9.5 Hours
  • Toolbag/Photoshop Rendering: 1 Hour
Overall, this was a very refreshing project to kick off 2017 with. It had a pretty short turnaround and it was a great re-introduction to some of this software that I haven't used in a few months. It got me super motivated for what comes next and I already have a few ideas for similar projects I'd like to do in the coming weeks.

I know I wanted to keep things short and offer more blog posts, but I think this in-depth description of my process is useful as well. I plan to do something similar for the next project I post about, and I might even make a video. But speaking of videos, I'll leave you with a short turntable of this model. Thanks for reading my post. I hope it was informative and you enjoyed. Until next time... Adios!